









Introduction to Norfolk Island Pine
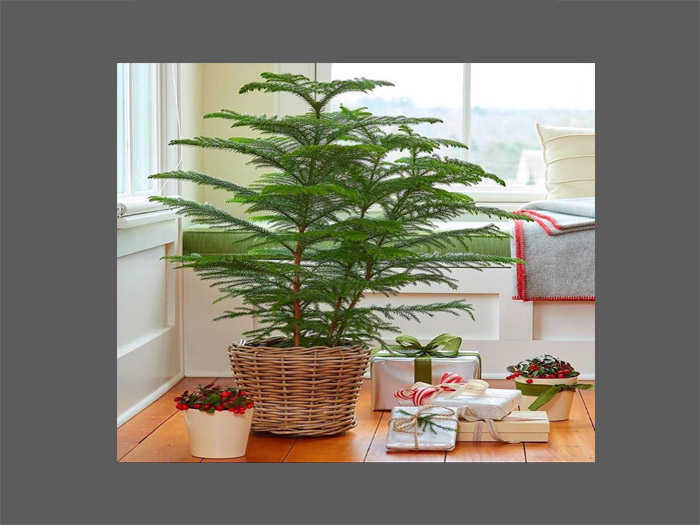
Scientific Name: Araucaria heterophylla
The Norfolk Island Pine is a beautiful evergreen conifer belonging to the Araucariaceae family, recognized for its symmetrical layered branches. Its native habitat is Norfolk Island, Australia. This elegant plant grows very slowly, producing only one, or at most two, new tiers of branches each year. By placing an online flower order or purchasing a Norfolk Island Pine houseplant, you can enjoy the unique beauty of its glossy needle-like foliage arranged in perfect layers around the central trunk. In the flower shop, it is recommended to avoid wiping the delicate needles or using leaf-shining chemicals. Instead, provide sufficient humidity through regular misting to keep the plant healthy and attractive.
Norfolk Island Pine Care Requirements:
Light: Although the plant tolerates partial shade, it grows best near a bright window with filtered sunlight. It can also tolerate outdoor conditions during spring and summer. In bright indirect light, the foliage remains greener, while more sunlight encourages faster growth. Rotate the pot 180 degrees every few weeks to ensure balanced growth and prevent leaning toward the light source.
Temperature: When purchasing a Norfolk Island Pine houseplant, keep room temperature in mind. The plant can tolerate temperatures up to 40°C (104°F), but it is not frost-tolerant and should never be exposed to freezing temperatures.
Watering: Water twice a week during summer and once every 7–10 days during winter. Keep the soil consistently moist but avoid waterlogging.
Soil: Compost-rich, lightweight soil is ideal for a Norfolk Island Pine. A mixture of two parts garden soil and three parts leaf mold or organic compost provides excellent growing conditions.
Fertilizing: During the growing season (spring and summer), feed the plant with a water-soluble fertilizer. Since Norfolk Island Pine has relatively low nutritional requirements, applying only half of the dosage recommended on the fertilizer package is sufficient.
Repotting Norfolk Island Pine: Before the plant reaches approximately one meter (3 feet) in height, it is generally repotted every year into a container one size larger. If the roots have filled the pot, gently loosen the soil around the edges with a small trowel while holding the trunk securely. Carefully tap the sides of the pot until the root ball slides out. Add a layer of fresh soil to the new pot before placing the plant inside. Gently loosen some of the outer roots so they can establish contact with the fresh soil, then fill around the root ball. Make sure the plant sits at the same soil level as before. Lightly tap the pot to eliminate air pockets without damaging the roots. Water thoroughly after repotting and place the plant in a shaded location for several days before returning it to its permanent spot.
Cleaning the Leaves: Regular misting is sufficient. Avoid using chemical leaf polish or shine products. Propagation of Norfolk Island Pine:
Propagating Norfolk Island Pine at home is quite difficult. Commercial flower shops generally propagate it by seed or stem cuttings. If using cuttings, they must be taken from the terminal tip of the main stem; otherwise, the new plant will develop with an irregular shape. Seed propagation is considered the most effective method for producing healthy plants. However, indoor Norfolk Island Pines rarely produce seeds outside their native environment, so seeds usually need to be purchased. With patience and proper care, successful propagation is possible.
Common Problems, Diseases, and Treatments:
1. Thin, weak branches: The plant requires additional feeding. Increase fertilization according to the plant's needs.
2. Needles turn yellow or brown and fall: The environment is too hot and dry. Move the plant to a cooler, well-ventilated location and increase watering and misting.
3. Small green insects appear on the needles and the foliage becomes sticky: Spray the plant every two weeks with a systemic insecticide according to the manufacturer's instructions until the infestation is eliminated.
4. Branches bend downward: The temperature is too low. Move the plant to a warmer location.
5. Lower branches lose their needles: This may be part of the natural aging process. If the plant is also receiving insufficient light, move it to a brighter location and prune any dead branches using clean, sharp pruning tools.
6. Needles remain green but continue falling: Overwatering is the likely cause. Allow the top layer of soil to dry before watering again, and reduce watering frequency.
7. Needles become pale or whitish: Excessive direct sunlight, especially through glass, is causing leaf burn. Move the plant to an area with bright, indirect light.
8. White cotton-like masses appear at the base of the needles: This is a sign of mealybugs. Treat the plant with an appropriate insecticide every two weeks or remove the pests manually using a cotton swab dipped in insecticide or rubbing alcohol.
9. Growth has stopped: Check the roots. If they have become root-bound, it is time to repot the plant into a larger container.
Low light, improper watering, low humidity, poor nutrition, excessive cold or heat, as well as insect pests and plant diseases, can all cause the branches and needles to become thin, weak, and droopy.