Close
(0) items
You have no items in your shopping cart.
All Categories
    Preferences
    Search
    RSS

    Blog

    Getting to Know the ZZ Plant
    0 Getting to Know the ZZ Plant

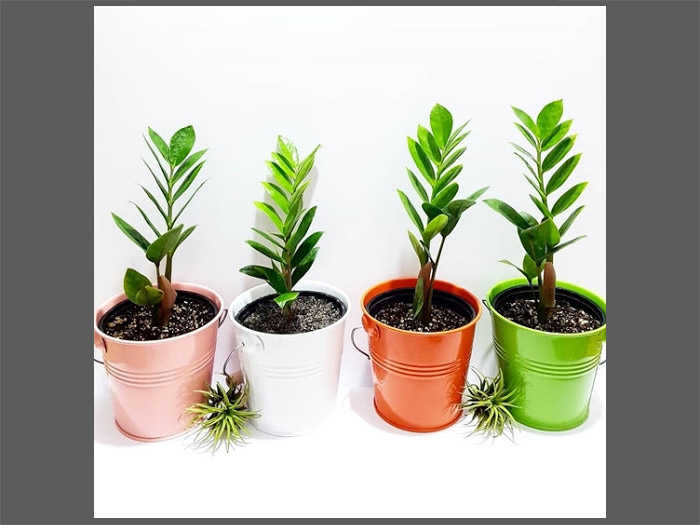
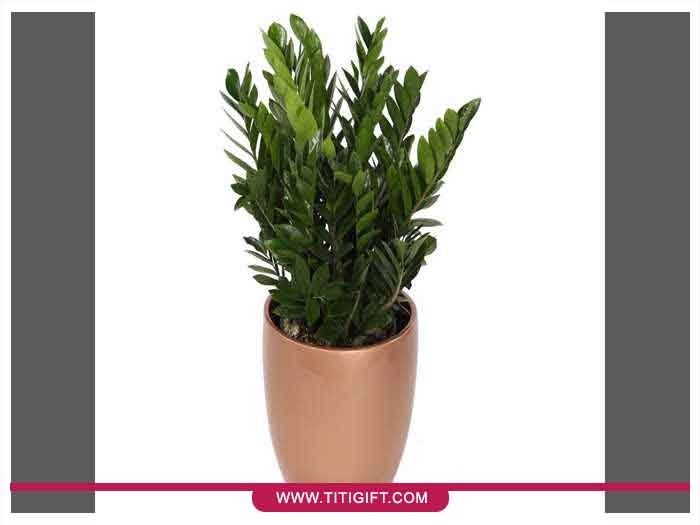
    The ZZ Plant, scientifically known as Zamioculcas zamiifolia and commonly called the Zanzibar Gem, is native to Eastern Africa and belongs to the Araceae family. Interestingly, this plant uses a unique photosynthesis system known as CAM (Crassulacean Acid Metabolism), similar to cacti, allowing it to tolerate drought exceptionally well. A ZZ Plant is an excellent choice for indoor spaces with limited natural light. By placing an order for a ZZ Plant, you'll enjoy one of the most resilient houseplants, thanks to its excellent tolerance to low light and infrequent watering.

    The ZZ Plant features elegant feather-shaped leaves growing on stems that typically reach 40 to 60 cm in height. Its glossy, dark green foliage makes it one of the most attractive indoor plants. Under ideal growing conditions, it may also produce small flowers in light yellow shades with bronze or brownish tones.

    Care Requirements:

    Temperature:
    The ideal indoor temperature ranges between 15°C and 30°C (59°F–86°F). If the environment becomes hotter, mist the leaves occasionally to help maintain their freshness.

    Watering:
    Overwatering is the only major enemy of the ZZ Plant. Its underground rhizomes store water, so excessive watering can lead to root and rhizome rot. Always allow the soil to dry out completely before watering thoroughly again. If you notice that the soil remains wet for an extended period, immediately improve air circulation and increase the amount of light. Never water again until the soil has completely dried.

    Light:
    A ZZ Plant grows well in both bright and low-light environments. However, avoid direct sunlight, as it can scorch the leaves. Brighter indirect light encourages thicker stems, while insufficient light may result in thinner growth.

    Humidity:
    Its naturally waxy leaves make the ZZ Plant highly resistant to moisture loss and low humidity. Although maintaining approximately 50% humidity can promote healthier growth, it is optional rather than essential.

    Soil:
    Use a lightweight, fast-draining potting mix. A cactus or succulent soil mix is an excellent choice for this plant.

    Fertilizing:
    Use fertilizers with high phosphorus and potassium content. Phosphorus promotes healthy rhizome development, which in turn encourages the plant to produce more leaves.

    Propagation:
    The ZZ Plant can be propagated by leaf cuttings or by dividing its rhizomes. Root formation usually takes about one month, followed by another month before new shoots begin to emerge. This slow propagation process is one of the reasons why ZZ Plants are often relatively expensive.

    Pests and Diseases:
    This plant is generally pest-resistant. The most common problem is root rot caused by excessive watering.

    Pruning:
    Remove any yellow or damaged leaves. If a stem begins to rot, cut it off completely at the base using a clean, sharp knife.

    Repotting:
    ZZ Plants actually grow better when they are slightly root-bound. Repot only when roots begin emerging from the drainage holes. Move the plant to a pot just one size larger during spring. Oversized pots encourage root growth instead of leaf production, temporarily slowing the plant's visible growth.

    Toxicity:
    All parts of the ZZ Plant are toxic if ingested. Keep it out of reach of children and pets. It is also recommended to wear gloves when handling or repotting the plant, or wash your hands thoroughly with soap and water afterward.

    ZZ Plant (Zamioculcas zamiifolia)

    Pothos Plant Guide
    0 Pothos Plant Guide

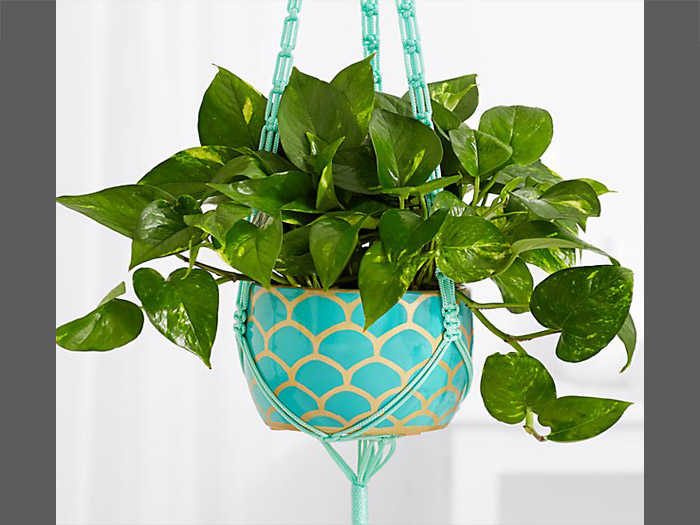
    The Pothos plant (Epipremnum aureum), also known simply as Pothos, is one of the best choices available in a flower shop when you want to buy an indoor plant. It is especially suitable for beginners because it is extremely easy to care for, adapts well to different environments, and remains healthy under a wide range of conditions. In addition to its durability and attractive appearance, Pothos has long been considered one of the most popular plants in Feng Shui. It plays an important role in producing oxygen while helping remove toxins and negative energy from indoor spaces.
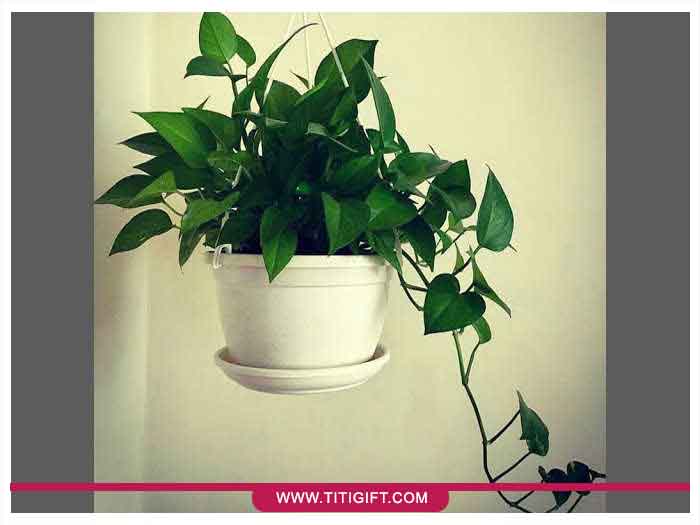
    Pothos belongs to the Araceae family and is native to the Solomon Islands. It is cultivated and propagated in warm greenhouses and is considered one of the toughest indoor plants available. By ordering a Pothos plant, you can easily transform your room into a lush green jungle thanks to its trailing vines. Its leaves may be variegated, dark green, or white, and the plant grows rapidly. This beautiful evergreen plant is also one of the few houseplants that can survive and continue growing in water without soil.
    Warning: Pothos is considered toxic to children and pets. If its leaves are chewed, they may cause illness. Therefore, keep the plant out of the reach of children and household pets.
    There are several varieties available when you order a Pothos plant. These varieties differ mainly in leaf shape and coloration. Pothos is often confused with Philodendron because of their similar leaves. However, Philodendron leaves are more pointed and distinctly heart-shaped, unlike the longer leaves of Pothos.

    1. Jade Pothos
    Jade Pothos features beautiful dark green heart-shaped leaves. It is one of the simplest and most popular varieties available. Compared with many other cultivars, it adapts better to different growing conditions, making it one of the best-selling houseplants in flower shops. One of its greatest advantages is its ability to thrive in low-light environments.

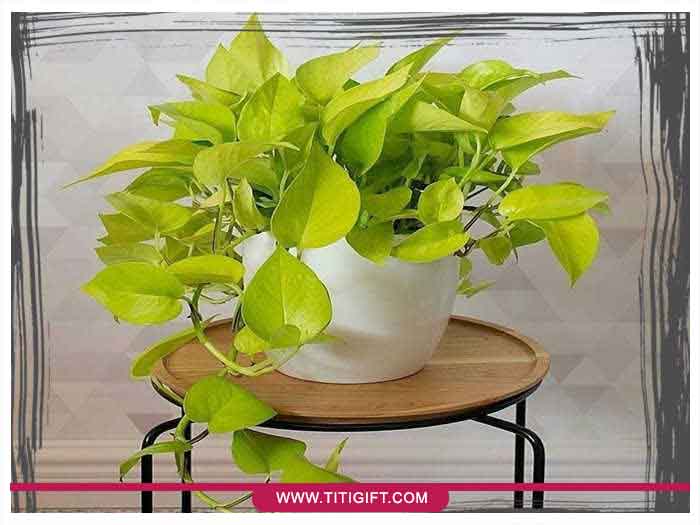
    2. Neon Pothos
    Neon Pothos stands out with its vibrant neon-green foliage. Despite its simple appearance, its bright leaves create a unique and eye-catching display. Like Jade Pothos, Neon Pothos grows well in low-light environments such as offices, apartments, and indoor workspaces.

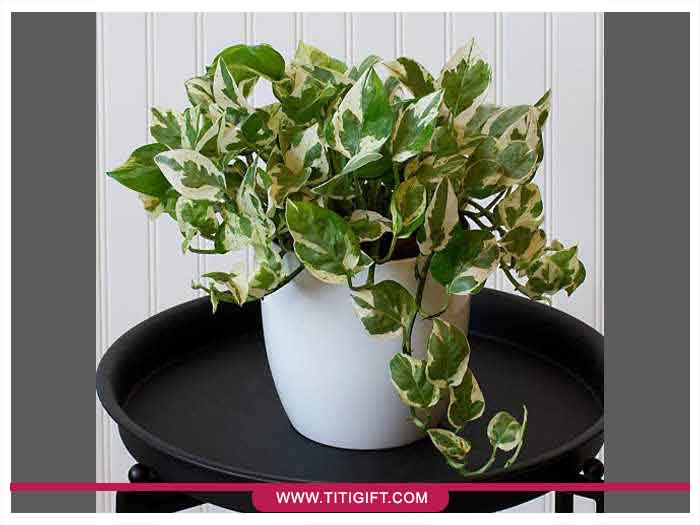
    3. White Pothos (N'Joy / Army Pothos)
    This variety has smaller leaves than most other Pothos cultivars and generally requires slightly more attention, making it somewhat less adaptable than the common green varieties.

    4. Marble Queen Pothos
    Marble Queen Pothos has leaves similar in shape to Jade Pothos but displays an elegant combination of green and creamy white variegation. Like natural marble, it is considered a highly decorative and valuable variety. To maintain its beautiful variegated foliage, it requires brighter indirect light than the standard green varieties.

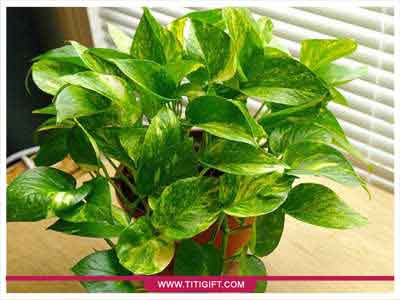
    5. Golden Pothos
    Golden Pothos features green leaves beautifully streaked with yellow and golden variegation. It is one of the easiest and most adaptable Pothos varieties to grow.

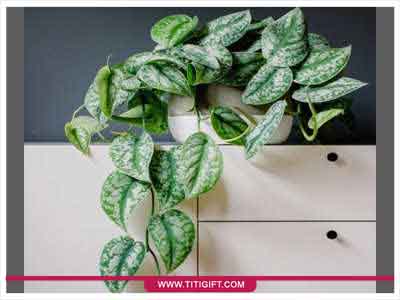
    6. Silver Pothos
    Silver Pothos is recognized for its unique green and silvery-gray foliage. It tolerates low light and infrequent watering exceptionally well, making it one of the hardiest and rarer Pothos varieties available.

    Common Pothos Diseases and Their Treatments
    Wrinkled leaves and brown spots: This usually indicates that the temperature is too low and the plant may have been exposed to cold damage. Avoid placing your Pothos near cold windows or behind curtains during winter nights. Move it to a warmer location.
    Holes in the leaves: Possible causes include:
    • Leaf-eating insects, usually found beneath leaves and stems during early morning or evening.
    • Direct sunlight combined with wet foliage.
    • Physical damage to the leaves.
    • Fungal diseases causing circular spots around the leaf margins.
    To treat these issues, first identify the underlying cause and then apply the appropriate solution. Why Are Pothos Leaves Wilting?
    One of the main reasons Pothos leaves become limp and lifeless is overwatering. To solve this problem, allow the top layer of the soil to dry completely to about one finger's depth before watering again.

    Why Isn't My Pothos Growing?
    If your Pothos is growing very slowly or has stopped growing altogether, the most common reason is a lack of nutrients in the soil. To prevent and solve this issue, feed the plant regularly with a balanced fertilizer formulated for houseplants or a fertilizer specifically recommended for Pothos. You can also use homemade organic fertilizers to improve soil fertility.

    A pot that has become too small can also restrict growth because the roots no longer have enough room to expand. In this case, repot the plant into a container that is only one size larger than the current pot. Keep in mind that choosing a pot that is excessively large may also slow growth and even damage the plant due to excessive moisture retention.

    Why Are the New Leaves Small?
    Small new leaves can result from several factors, but one of the most common causes is low humidity. Increase humidity by misting the plant regularly or using other methods such as a humidifier or a pebble tray to provide the moisture your Pothos needs.

    How Can You Make Your Pothos Fuller?
    If you want a lush, bushy Pothos, provide the proper growing conditions, including a suitable pot, bright indirect light, appropriate watering, and regular fertilization. Pruning the growing tips can also encourage fuller growth.

    Why Is My Pothos Becoming Sparse?
    If your Pothos has long vines with very few leaves, there are generally two main reasons:
    1. Insufficient light. Move the plant to a brighter location with indirect sunlight.
    2. Nutrient deficiency. Feed the plant regularly with a balanced houseplant fertilizer or suitable organic fertilizer.

    Why Isn't My Pothos Trailing?
    Be patient. Once your Pothos becomes accustomed to its environment and receives enough light, water, nutrients, and proper care, it will grow rapidly and naturally develop long trailing vines.

    Why Are My Pothos Leaves Turning Yellow?

    1. Waterlogged Soil
    If the lower leaves are turning yellow and falling off, the soil may be staying too wet. Check that the pot has proper drainage, empty excess water from the saucer, and increase the interval between waterings. Constantly wet soil can lead to root rot.

    2. Watering with Cold Water
    Using cold water for watering or misting can shock the plant and cause yellowing leaves. Always use room-temperature, chlorine-free water whenever possible.

    3. Underwatering
    Excessive dryness may also cause yellow leaves, drooping stems, and overall decline. Increase watering appropriately and move the plant to a cooler location if necessary.

    4. Fungal Infection
    Yellow leaves may indicate a fungal disease. Remove affected leaves and disinfect the stems using a mild soap-and-water solution. If the infection spreads, use an appropriate fungicide according to the manufacturer's instructions.

    5. Nutrient Deficiency
    If your Pothos has not been repotted or fertilized for a long time, depleted soil nutrients may cause yellow leaves. Applying a suitable houseplant fertilizer will usually correct the problem.

    6. Cold Drafts
    Cold air currents can also cause yellowing foliage. Move the plant away from cold windows or air conditioners. The ideal temperature for Pothos is between 15°C and 25°C (59°F–77°F).

    7. Insufficient Light
    Variegated varieties require more light than solid green varieties. If the leaves farther from the light source become yellow while those closer to the light remain vibrant, your plant needs brighter indirect light.

    8. Environmental Changes
    If you have recently moved your Pothos or repotted it, the plant may experience transplant shock. Some yellow leaves are normal during this adjustment period. However, excessive yellowing after repotting may indicate poor drainage, so make sure the pot has adequate drainage holes. Why Are My Pothos Leaves Losing Their Color?
    Insufficient light is one of the most common reasons for pale or faded Pothos leaves. Move the plant to a brighter location with plenty of indirect sunlight for a period of time to restore its healthy color.

    Brown Spots and Burnt Leaf Tips
    Brown spots and scorched leaf tips are usually caused by direct sunlight. Prolonged exposure to intense sun can damage the foliage of heart-leaf Pothos. Leaves that come into contact with hot window glass may also develop similar burns.

    Why Is My Variegated Pothos Losing Its Pattern?
    Although Pothos can tolerate relatively low-light conditions, insufficient light causes the beautiful variegation on the leaves to fade, turning them mostly green. To preserve the attractive patterns on Golden Pothos and Marble Queen Pothos, place the plant in a bright location with indirect light.

    Why Are the Leaves So Far Apart?
    Long gaps between leaves, often called "leggy" growth, are usually the result of inadequate light and insufficient nutrients. Move the plant to a brighter location with indirect sunlight and fertilize it every two weeks during the growing season.

    Why Aren't New Leaves Growing During the Growing Season?
    If your Pothos is not producing new leaves during its active growing season, the surrounding temperature may be too low. Move the plant to a warmer environment and ensure it receives proper light, watering, and nutrients to encourage healthy new growth.

    Environmental Requirements
    Temperature: Moderate to warm. Ideal temperatures range from 16–19°C (61–66°F) at the minimum to approximately 30°C (86°F) at the maximum.
    Light: Moderate to bright indirect light.
    Watering: Moderate. Allow the top layer of soil to dry slightly between waterings.
    Pests & Diseases: Relatively resistant to most common houseplant pests and diseases when properly maintained.

    Introduction to Schefflera (Umbrella Plant)
    0 Introduction to Schefflera (Umbrella Plant)

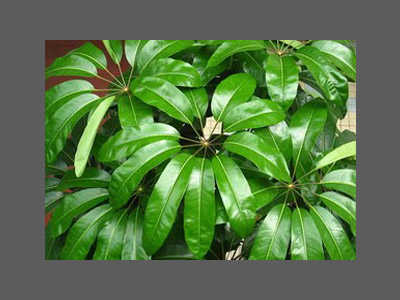
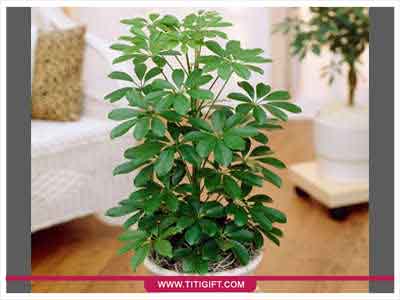
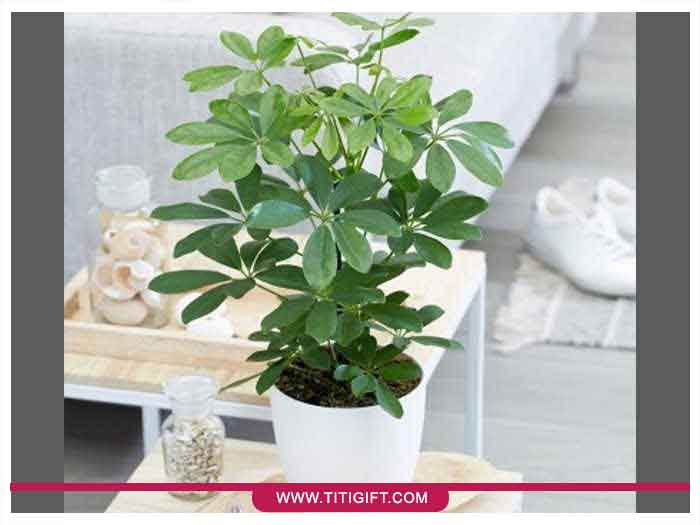
    By placing an online flower order, you can enjoy the beauty of the Schefflera houseplant, also known as the Umbrella Plant. This attractive evergreen originates from Australia and belongs to the Araliaceae family. Its glossy, leathery, bright green leaves make it one of the most popular indoor ornamental plants.
    In its natural habitat, the Schefflera tree can grow up to 3 meters (10 feet) tall. Unlike many ornamental plants that develop side branches after the terminal bud is removed, Schefflera typically grows with a single main stem.
    Schefflera Growing Requirements
    Light: Schefflera prefers bright, indirect light. Occasionally placing the pot in gentle morning sunlight is beneficial. If the plant receives insufficient light, the leaves become dull, lose their vigor, and may begin to drop. In this case, move the plant closer to a bright window.
    Temperature: The ideal temperature for Schefflera is up to 27°C (81°F) during summer and no lower than 18°C (64°F) during winter. If temperatures rise above normal, provide good air circulation. Excessive heat or cold causes the upper leaves to wilt, so water the plant properly and adjust the room temperature as needed.
    Watering: Allow the soil to dry slightly between waterings, and reduce watering during winter. For variegated Schefflera varieties, excessive watering and poor drainage can lead to root rot and black spots on the white or cream-colored sections of the leaves. In such cases, reduce watering, treat the soil with an appropriate fungicide, increase light exposure, and begin feeding the plant with fertilizer containing humic acid.
    Humidity: Mist the plant twice a week throughout the year. If the air is dry, place the pot on a pebble tray filled with water to maintain consistent humidity. Dry air causes the plant to lose its freshness. If brown spots appear on the leaves, stop misting and rely on the humidity tray instead.
    Fertilizing: Feed your Schefflera plant every two weeks with a water-soluble fertilizer formulated for ornamental plants, following the manufacturer's instructions. Variegated cultivars also benefit from an iron supplement once a month to maintain their vibrant leaf color.
    Soil: A high-quality Dutch potting mix is ideal. A combination of peat moss, perlite, leaf mold, coco peat, and a small amount of sand provides excellent drainage and healthy root growth.
    Repotting Schefflera
    Young, actively growing plants should be repotted twice a year. As the plant matures, repotting once every one or two years is sufficient. If repotting is not possible, replace the top layer of soil with fresh, nutrient-rich potting mix. Tall plants may require a support stake. In the flower shop, a common recommendation is to repot Schefflera when roots begin emerging from the drainage holes of the container.
    Cleaning the Leaves: Regular misting is sufficient to keep the leaves clean. Avoid chemical leaf shine products, although occasional use (no more than once a month) is acceptable if desired.
    Schefflera occasionally benefits from pruning. Removing the terminal buds encourages the growth of lateral branches, creating a fuller plant. Purchasing a Schefflera houseplant from a flower shop is an excellent choice for office hallways and corridors because of its tolerance to challenging indoor conditions.
    How to Propagate Schefflera
    Schefflera can be propagated from mid to late spring using one of three methods: 1. Seeds 2. Stem tip cuttings 3. Stem cuttings
    Propagation by Seed: Sow the seeds evenly in a seed tray filled with seed-starting compost and keep them at approximately 20°C (68°F). When seedlings reach 2.5–4 cm (1–1.5 inches) in height, transplant each into a 6 cm pot filled with quality potting compost and place them in bright, indirect light.
    Propagation by Cuttings: Take stem cuttings 8–10 cm (3–4 inches) long using clean pruning shears. Dip the cut end into rooting hormone and plant each cutting in a 6–9 cm pot filled with propagation compost. Cover the pot with a clear plastic bag to maintain humidity. Keep the temperature between 21–24°C (70–75°F) and protect the cuttings from direct sunlight. Keep the soil moist but not waterlogged, as excessive moisture causes root rot. After about one month, once roots have formed, remove the plastic cover and transplant the young plant into a 13 cm pot containing standard potting compost.
    Common Schefflera Pests and Diseases
    Young leaves have fewer leaflets: This is normal. Mature leaves typically develop seven leaflets.
    Variegated leaves lose their color: The plant is not receiving enough light. Move it to a brighter location with indirect sunlight.
    White cotton-like masses appear on the leaves: Mealybugs are the cause. Spray the plant with a systemic insecticide every two weeks until the infestation is eliminated.
    Brown spots appear on stems, leaf stalks, and leaf undersides: Treat the undersides of the leaves with a systemic insecticide and gently clean the affected areas with a soft brush after 48 hours.
    Leaves become distorted, sticky, and covered with green insects: Aphids are present. Apply a systemic or contact insecticide weekly according to the product instructions until the pests disappear.
    Leaves turn yellow and show fine webbing underneath: This indicates a spider mite infestation. Spray with a suitable miticide every 14 days. Regular misting also helps reduce spider mite populations.
    Long stems with wide spaces between leaves: The environment is too warm. Move the plant to a cooler, well-ventilated location. Avoid misting under these conditions.
    The plant is wilted and leaves are drooping: The plant is thirsty. Place the pot in a basin of water for about 15 minutes and continue regular misting afterward.
    Leaves become pale yellow: The soil lacks essential nutrients. Feed the plant with a balanced fertilizer every two weeks.
    Leaves turn yellow and fall off: Overwatering is the most common cause. Allow the top layer of soil to dry between waterings, check that the drainage holes are not blocked, and always empty excess water from the saucer beneath the pot.

    Introduction to Norfolk Island Pine
    0 Introduction to Norfolk Island Pine

    Scientific Name: Araucaria heterophylla
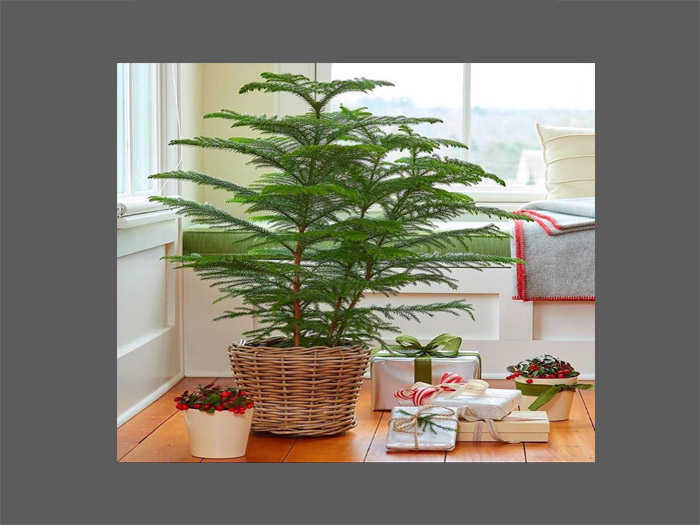
    The Norfolk Island Pine is a beautiful evergreen conifer belonging to the Araucariaceae family, recognized for its symmetrical layered branches. Its native habitat is Norfolk Island, Australia. This elegant plant grows very slowly, producing only one, or at most two, new tiers of branches each year. By placing an online flower order or purchasing a Norfolk Island Pine houseplant, you can enjoy the unique beauty of its glossy needle-like foliage arranged in perfect layers around the central trunk. In the flower shop, it is recommended to avoid wiping the delicate needles or using leaf-shining chemicals. Instead, provide sufficient humidity through regular misting to keep the plant healthy and attractive.
    Norfolk Island Pine Care Requirements:
    Light: Although the plant tolerates partial shade, it grows best near a bright window with filtered sunlight. It can also tolerate outdoor conditions during spring and summer. In bright indirect light, the foliage remains greener, while more sunlight encourages faster growth. Rotate the pot 180 degrees every few weeks to ensure balanced growth and prevent leaning toward the light source.
    Temperature: When purchasing a Norfolk Island Pine houseplant, keep room temperature in mind. The plant can tolerate temperatures up to 40°C (104°F), but it is not frost-tolerant and should never be exposed to freezing temperatures.
    Watering: Water twice a week during summer and once every 7–10 days during winter. Keep the soil consistently moist but avoid waterlogging.
    Soil: Compost-rich, lightweight soil is ideal for a Norfolk Island Pine. A mixture of two parts garden soil and three parts leaf mold or organic compost provides excellent growing conditions.
    Fertilizing: During the growing season (spring and summer), feed the plant with a water-soluble fertilizer. Since Norfolk Island Pine has relatively low nutritional requirements, applying only half of the dosage recommended on the fertilizer package is sufficient.
    Repotting Norfolk Island Pine: Before the plant reaches approximately one meter (3 feet) in height, it is generally repotted every year into a container one size larger. If the roots have filled the pot, gently loosen the soil around the edges with a small trowel while holding the trunk securely. Carefully tap the sides of the pot until the root ball slides out. Add a layer of fresh soil to the new pot before placing the plant inside. Gently loosen some of the outer roots so they can establish contact with the fresh soil, then fill around the root ball. Make sure the plant sits at the same soil level as before. Lightly tap the pot to eliminate air pockets without damaging the roots. Water thoroughly after repotting and place the plant in a shaded location for several days before returning it to its permanent spot.
    Cleaning the Leaves: Regular misting is sufficient. Avoid using chemical leaf polish or shine products.
    Propagation of Norfolk Island Pine:
    Propagating Norfolk Island Pine at home is quite difficult. Commercial flower shops generally propagate it by seed or stem cuttings. If using cuttings, they must be taken from the terminal tip of the main stem; otherwise, the new plant will develop with an irregular shape. Seed propagation is considered the most effective method for producing healthy plants. However, indoor Norfolk Island Pines rarely produce seeds outside their native environment, so seeds usually need to be purchased. With patience and proper care, successful propagation is possible.
    Common Problems, Diseases, and Treatments:
    1. Thin, weak branches: The plant requires additional feeding. Increase fertilization according to the plant's needs.
    2. Needles turn yellow or brown and fall: The environment is too hot and dry. Move the plant to a cooler, well-ventilated location and increase watering and misting.
    3. Small green insects appear on the needles and the foliage becomes sticky: Spray the plant every two weeks with a systemic insecticide according to the manufacturer's instructions until the infestation is eliminated.
    4. Branches bend downward: The temperature is too low. Move the plant to a warmer location.
    5. Lower branches lose their needles: This may be part of the natural aging process. If the plant is also receiving insufficient light, move it to a brighter location and prune any dead branches using clean, sharp pruning tools.
    6. Needles remain green but continue falling: Overwatering is the likely cause. Allow the top layer of soil to dry before watering again, and reduce watering frequency.
    7. Needles become pale or whitish: Excessive direct sunlight, especially through glass, is causing leaf burn. Move the plant to an area with bright, indirect light.
    8. White cotton-like masses appear at the base of the needles: This is a sign of mealybugs. Treat the plant with an appropriate insecticide every two weeks or remove the pests manually using a cotton swab dipped in insecticide or rubbing alcohol.
    9. Growth has stopped: Check the roots. If they have become root-bound, it is time to repot the plant into a larger container.
    Low light, improper watering, low humidity, poor nutrition, excessive cold or heat, as well as insect pests and plant diseases, can all cause the branches and needles to become thin, weak, and droopy.

    Introduction to Bonsai
    0 Introduction to Bonsai

    A Bonsai plant is a miniature tree cultivated in a container. In fact, the Japanese word "Bonsai" literally means "planted in a container."
    How to Position a Bonsai Tree:
    Before placing your bonsai plant in the ideal location, you should first know the tree species and its specific care requirements. Most bonsai trees, such as juniper, pine, and spruce, are outdoor species that should experience the same seasonal conditions as their full-sized counterparts.
    Outdoor bonsai trees also include deciduous species whose leaves change with the seasons. These include maple, elm, and ginkgo. Do not place them on a kitchen windowsill or coffee table. Bonsai are real trees, and trees naturally belong outdoors. Unless your bonsai is a Serissa or a Ficus, it is best to keep it outside whenever possible. However, there are a few species available for those looking to buy indoor plants that can tolerate indoor conditions.
    Subtropical bonsai species that thrive in stable temperatures throughout the year include:
    Jade plants, Hawaiian umbrella trees, and Ficus trees. Once you determine which type of bonsai you have purchased from your indoor plant order, the remaining care becomes much easier. Below are several general guidelines that apply to most bonsai trees.
    Placement: Keep your bonsai away from direct sources of heat.
    Lighting: Place your bonsai in a location that receives plenty of natural light.
    Humidity: Bonsai trees require adequate humidity to keep their soil properly moist.
    Watering Your Bonsai: One of the most common reasons bonsai trees die is underwatering. Because the soil layer is very shallow, it dries out quickly. Bonsai trees should be watered whenever the top layer of soil becomes dry.
    According to professional florists, the watering frequency depends on the tree species, its size, and the type of soil used. Some bonsai may even require watering once a day. Instead of following a fixed routine, evaluate each ornamental plant individually before watering.
    The primary goal of watering is to completely saturate the root system. To ensure thorough watering, continue until water drains from the drainage holes. However, overwatering can also be harmful. Symptoms of excessive watering include yellowing leaves and dieback of smaller branches.
    When drainage is poor, the roots remain submerged in water and become deprived of oxygen, preventing healthy growth. Soil erosion and root problems may also occur due to inadequate drainage. To ensure proper watering, inspect your bonsai tree daily.
    Choosing the Right Soil for Bonsai: The key to selecting the right soil is ensuring proper drainage. Add coarse particles to the soil mixture to improve drainage. An ideal bonsai soil should also retain sufficient moisture, which can be enhanced by adding clay. Fertile soil ensures your tree receives the nutrients it needs to remain healthy. A balanced fertilizer containing equal amounts of nitrogen, phosphorus, and potassium is recommended. Always water your bonsai thoroughly before applying fertilizer, as fertilizing dry soil may damage the roots.
    Best Trees for Growing as Bonsai According to Florists:
    1. Japanese Maple     2. Buddha Tree     3. Rock Cotoneaster     4. Baobab (Adansonia)     5. European Beech     6. Boxwood     7. Pomegranate     8. Juniper     9. Ficus Retusa     10. Weeping Fig     11. Jade Tree     12. Lacebark Tree
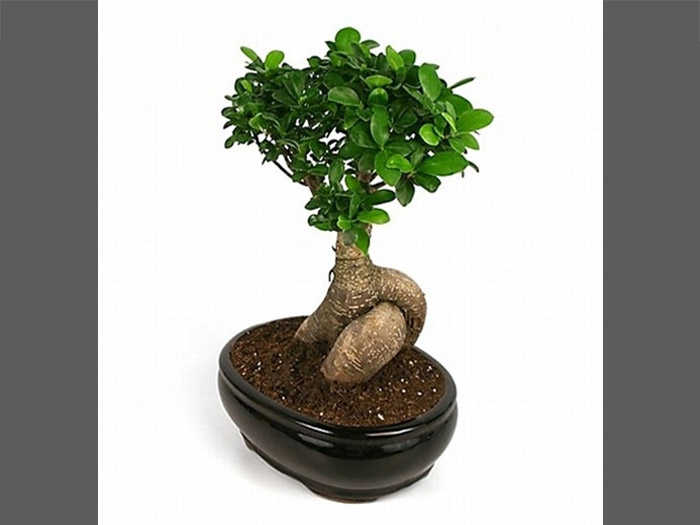
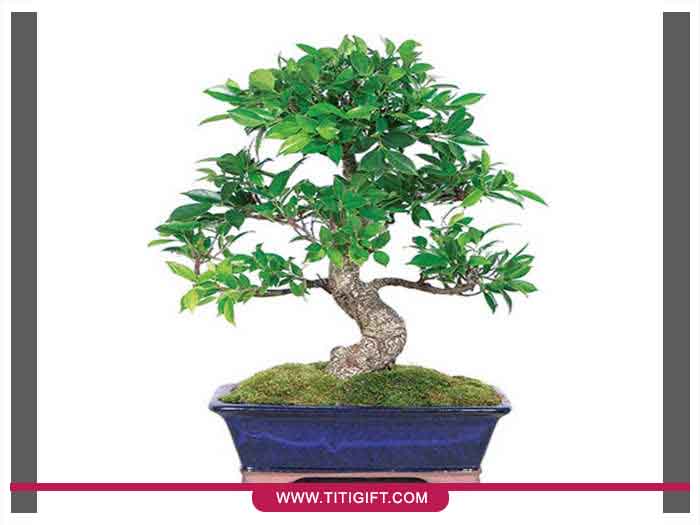
    Ficus Retusa Bonsai                                                 Ficus Retusa

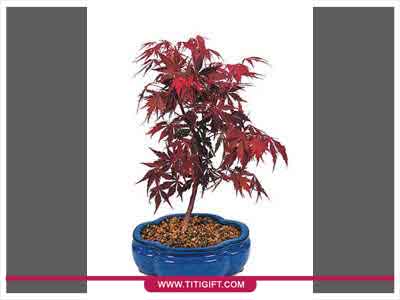
    Japanese Maple Bonsai                                                 Japanese Maple

    Introduction to Crassula Bonsai
    0 Introduction to Crassula Bonsai

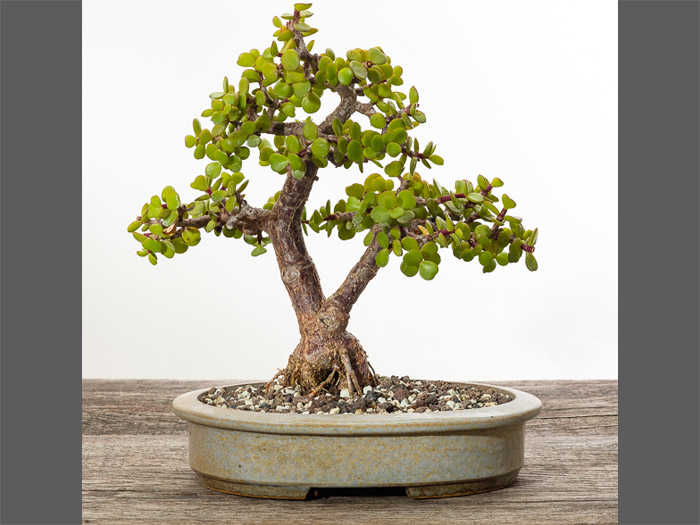
    The Crassula plant, scientifically known as Crassula ovata, belongs to the Crassulaceae family and the Crassula genus. Native to South Africa, it has become one of the most popular choices for buying houseplants around the world.
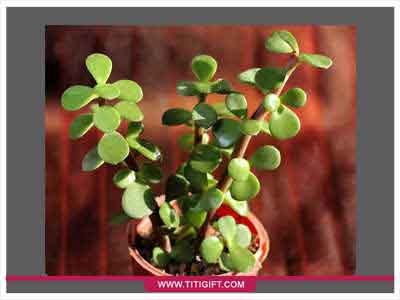
    Crassula ovata is a succulent evergreen plant, meaning its leaves and stems store water. It has thick, glossy leaves and a relatively slow growth rate. In the floral industry, Crassula ovata is commonly known as the Jade Plant, a name inspired by its beautiful jade-green leaves. Under different lighting conditions, the edges of its leaves may develop an attractive reddish tint. As the plant matures, its stems gradually become woody and brown.
    With proper care and when you order a Crassula plant, it can bloom during spring, producing clusters of small white or pale pink star-shaped flowers. One of the key conditions required for flowering is a cool, dry, and dark dormant period during winter.
    Among the many Crassula cultivars available in flower shops, Crassula ovata 'Hummel's Sunset' is one of the most popular varieties. It is distinguished by its attractive foliage, surrounded by a narrow red margin along the edges of the leaves.
    Today, Crassula Bonsai has also become increasingly popular. Bonsai Crassula plants typically reach a height of around 30 cm and are highly valued for their miniature tree-like appearance. Common English names for this plant include Lucky Plant, Friendship Plant, Jade Plant, and Money Tree.
    Crassula (Jade Plant) Care Guide:
    Watering: Like other Crassula species, Jade Plants require relatively little water. During summer, allow the soil to dry completely between waterings. In winter, wait until the soil is dry to a depth of about 1–2 cm before watering again. Overwatering is the most common cause of problems, leading to leaf drop and stem rot. On the other hand, prolonged underwatering causes the leaves to lose their thickness, and extended drought may eventually result in leaf drop as well.
    Light: Crassula loves bright light. It tolerates direct sunlight well and, under such conditions, develops thicker stems and denser foliage. It can also adapt to lower light levels, although the leaves become more widely spaced along the stems. Morning to midday sunlight is preferred over the intense afternoon sun, as higher afternoon temperatures combined with direct sunlight may damage the plant. Therefore, a south-facing window is considered the ideal location for growing Crassula indoors. With sufficient light, the edges of the leaves develop beautiful red highlights that greatly enhance the plant's ornamental value.
    Temperature: The ideal temperature for healthy growth is between 15°C and 24°C (59°F–75°F). Although Crassula tolerates cooler temperatures, it is best to keep it at around 10°C (50°F) during winter to minimize the risk of frost damage and stem rot.
    Soil: Crassula requires a light, well-draining potting mix that prevents water from remaining around the roots for extended periods. A mixture of leaf mold, coco peat, and perlite provides excellent drainage. However, any lightweight potting mix with good drainage can also be used successfully.
    Fertilizing: Feed the plant once a month during spring, summer, and autumn with a balanced houseplant fertilizer. During winter, allow the plant to rest without fertilizing.
    Repotting: Frequent repotting is unnecessary. In fact, the plant should only be repotted when the roots begin emerging from the drainage holes at the bottom of the pot.

    Propagating Crassula (Jade Plant)
    Propagating Crassula from a Leaf: Propagating the Jade Plant is very easy. A single healthy leaf can be removed from the plant and placed upright in a suitable moisture-retaining growing medium until it develops roots. For example, a mixture of sand and perlite is an excellent medium for rooting leaf cuttings. Once roots have formed, a small new plant will begin to grow. Keep in mind that the original leaf used for propagation will eventually dry out and die after providing energy for the new plant. Place the pot containing the leaf cuttings in a bright location away from direct sunlight. Root formation usually takes about one month. During this period, watering is unnecessary and may even cause the cuttings to rot. Therefore, moistening the growing medium before placing the cuttings is generally sufficient.
    Propagating Crassula from Stem Cuttings: The stems of the Jade Plant naturally have the ability to produce roots wherever they come into contact with soil, especially around the nodes (the points where leaves attach to the stem). Rooting is generally more successful when the days are shorter, such as in autumn or early spring, although stem cuttings can be taken successfully throughout the year. Choose a mature, healthy stem and cut a section approximately 7–10 cm (3–4 inches) long just above a node. Each cutting should have at least one pair of leaves. If there are additional leaves on the lower part of the cutting, remove them to make planting easier. Before planting, allow the cuttings to dry in a warm, shaded place overnight so the cut surface can callus. Then place the cuttings into the prepared growing medium. Watering is not necessary until roots begin to develop. Root growth usually starts after approximately 3–4 weeks.
    Pruning the Jade Plant
    Late winter or early spring is the ideal time to prune a Jade Plant. Remove any stems or branches that reduce the plant's overall appearance or have become damaged. Avoid pruning more than 30% of the plant at one time, as excessive pruning may cause stress. In addition, pinching back the tips of selected stems periodically during the growing season encourages a fuller, bushier, and more compact plant.

    Introduction to Aglaonema
    0 Introduction to Aglaonema

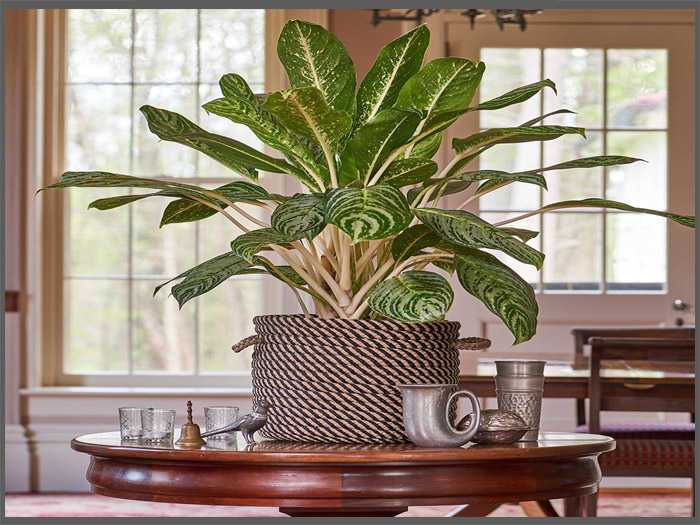
    The Aglaonema plant offers numerous health benefits and, according to NASA research, is listed among the best air-purifying plants. By ordering an Aglaonema houseplant, you will own a beautiful plant that absorbs airborne pollutants and harmful chemicals while releasing fresh oxygen. Different varieties of Aglaonema plants are available in a wide range of colors and patterns, each with its own unique beauty. For example, the White Aglaonema is one of the most popular choices for plant lovers, featuring stunning foliage with a combination of white and dark green. This attractive plant belongs to the Araceae family and includes more than 40 different species, each with its own distinctive appearance.
    Most Aglaonema varieties have variegated foliage with short stems and lance-shaped leaves that gently arch downward. The leaves range from 10 cm to over 30 cm in length, while mature plants can grow taller than 60 cm. Under ideal growing conditions, Aglaonema produces small white flowers that have little ornamental value, so they are usually removed to encourage healthier foliage growth.
    Aglaonema is highly tolerant of heat and dry conditions, making it an easy-care houseplant and an excellent choice for homes and offices. One of its greatest advantages is its ability to remove toxins from indoor air quickly, which is why it is considered one of the best bedroom plants. While all plants absorb carbon dioxide during the day and release oxygen, air-purifying plants such as Aglaonema continue producing oxygen at night while also filtering harmful pollutants. As a result, placing one in your bedroom can help create a fresher atmosphere and promote a more restful sleep. Thanks to its simple care requirements, Aglaonema is also one of the best recommendations for beginner plant owners.
    Types of Aglaonema
    The different varieties of Aglaonema mainly differ in leaf size, shape, and color. Some have narrow or smaller leaves, while others feature broader and longer foliage. Leaf coloration also varies significantly. Almost all Aglaonema varieties available in the market have variegated leaves, and colorful cultivars generally require brighter light to maintain their vibrant appearance.
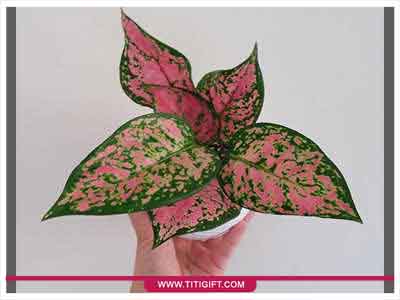
    1- Pink Aglaonema: There are many beautiful pink varieties, including Red Aglaonema, Lipstick Aglaonema, Suzy, and many others. Some of these popular cultivars are introduced below. Because of their colorful foliage, they require more light than green varieties.
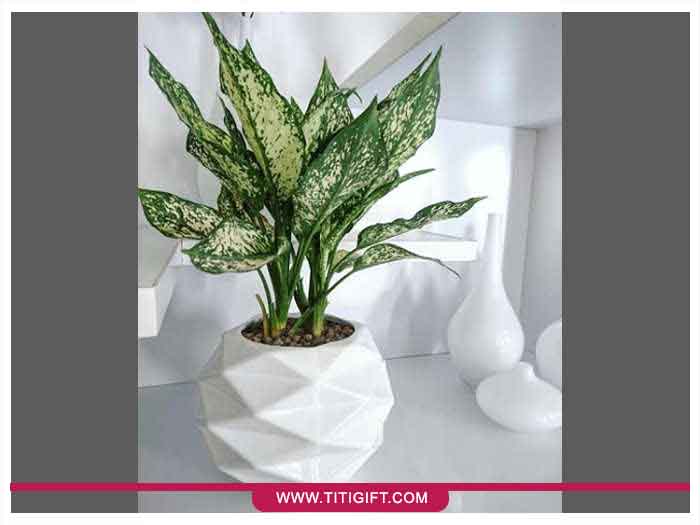
    2- White Aglaonema: White Aglaonema is one of the most popular varieties, recognized by its attractive white-speckled leaves. Since its foliage contains less chlorophyll, it requires brighter indirect light to maintain its freshness and beautiful coloration.
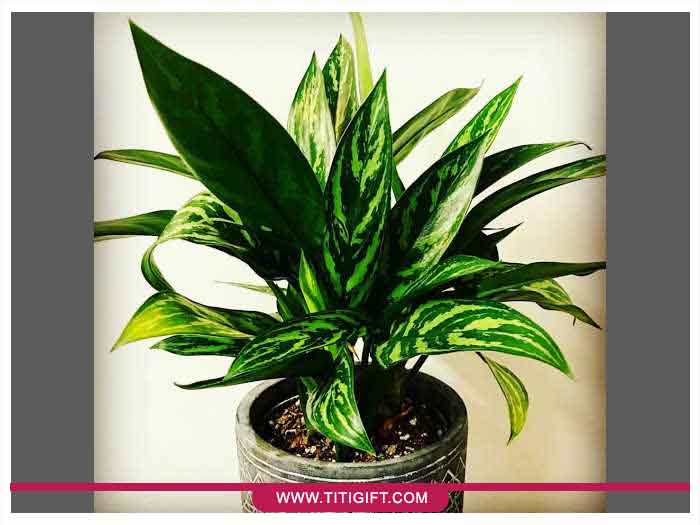
    3- Black Aglaonema: Black Aglaonema is a hardy and highly popular variety. Thanks to its darker foliage, it tolerates lower light conditions better than many colorful cultivars.
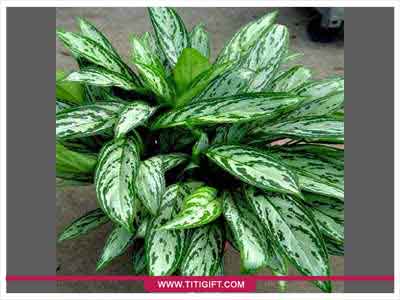
    4- Aglaonema Silver Queen: This is one of the best-known and most widely grown Aglaonema varieties. It requires very little maintenance and is an ideal choice for beginners who are growing houseplants for the first time.
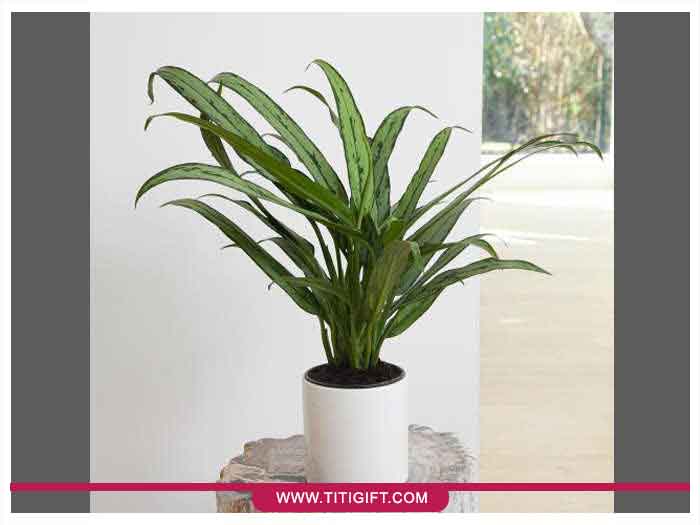
    5- Aglaonema Cutlass (Aglaonema Cutlass): Also known as the Sword Aglaonema, this variety gets its name from its long, narrow, sword-shaped leaves.
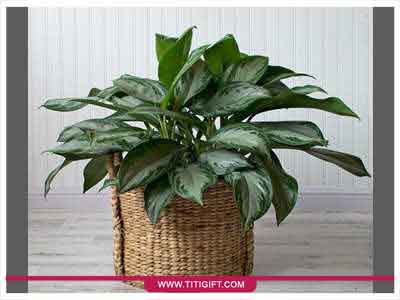
    6- Aglaonema Emerald Bay (Aglaonema Emerald Bay): Like other dark-leaved cultivars, Emerald Bay performs well in low-light environments and is appreciated for its elegant foliage.
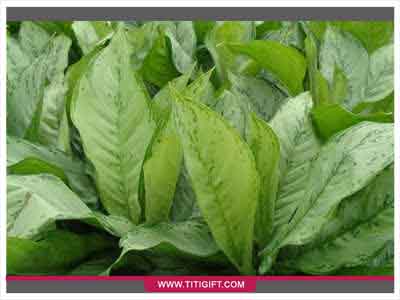
    7- Aglaonema BJ Freeman (Aglaonema BJ Freeman)
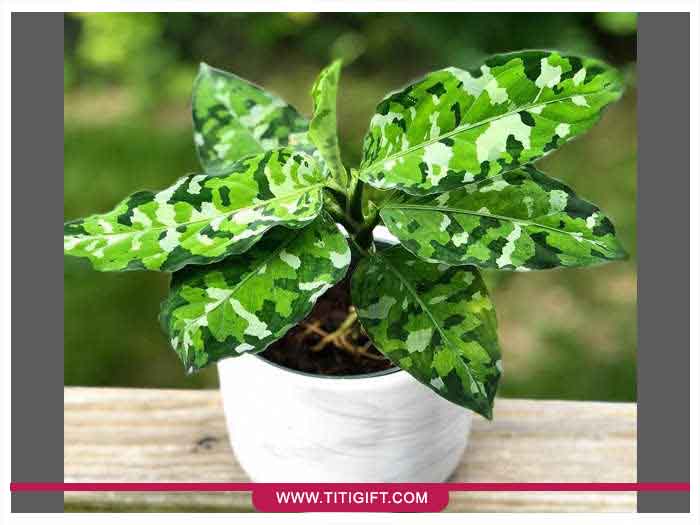
    8- Aglaonema Pictum Velvet (Aglaonema Pictum Velvet): This rare variety features exceptionally unique and eye-catching foliage and is considered very uncommon in our country.
    Aglaonema Care Guide:
    The care requirements of different Aglaonema varieties are generally the same. The primary difference between cultivars is the amount of light they need.
    Light: Aglaonema has low light requirements and ranks among the best houseplants that can survive in limited natural light. The ideal location is near a north-facing window where it receives bright indirect light. Avoid placing the plant in direct sunlight, as this can scorch and damage its leaves. Keep in mind that colorful and variegated varieties require more light than dark green ones, and insufficient light may cause their vibrant leaf colors to fade.
    Watering: Most Aglaonema varieties have similar watering needs. Water the plant only when the top layer of soil has dried completely. Overwatering can damage the leaves and lead to root rot, one of the most common problems affecting this plant.
    Humidity: Since Aglaonema is native to warm and humid tropical regions, it thrives in a humid environment. You can increase humidity by using common methods such as placing a tray of water nearby or creating a pebble tray beneath the pot. During summer, misting the leaves once a day with cooled boiled water is also beneficial. Interestingly, because of its love for humidity, Aglaonema is an excellent choice for bathrooms with sufficient natural light.
    Temperature: The ideal temperature for Aglaonema is between 18°C and 25°C (64°F–77°F). This plant is sensitive to cold temperatures, and prolonged exposure to cold can quickly kill it. Likewise, placing it too close to heating or air-conditioning vents can also damage the plant.
    Fertilizing: Aglaonema does not require heavy feeding, but for healthier growth during its active growing seasons (spring and summer), you can apply a balanced houseplant fertilizer every two weeks according to the manufacturer's instructions.
    Soil: A light, well-draining potting mix is ideal for Aglaonema. A combination of leaf mold, sand, peat moss, garden soil, or a quality ready-made potting mix enriched with organic matter provides excellent growing conditions.
    Repotting: Aglaonema usually needs repotting every one to two years. However, if roots begin growing out of the drainage holes or the leaves become weak despite proper care, it is a sign that the plant has outgrown its pot and should be repotted.
    Cleaning the Leaves: If dust accumulates on the leaves, gently wipe them with lukewarm, mineral-free water from time to time. If stains remain after cleaning with water, you can use a diluted mixture of milk and water to remove them. This solution also provides beneficial nutrients that help keep the foliage healthy and glossy.

    Common Aglaonema Diseases and Their Treatment:
    Brown Spots on the Leaves: Brown spots usually indicate improper growing conditions. They may result from excessive direct sunlight, misting the leaves while they are exposed to sunlight, air pollution, or pests living in the soil. First identify the exact cause, then treat the problem accordingly. For pest infestations, begin with natural or homemade pest-control methods before resorting to chemical pesticides if necessary.
    Drooping or Wilted Leaves: This problem is commonly caused by exposure to cold air, a pot that has become too small, or insufficient watering. Move the plant to a warmer location and make sure it is watered before the soil becomes excessively dry.
    Small White Cotton-Like Insects Under the Leaves: These insects are known as mealybugs. Before using chemical insecticides, try removing them with a diluted solution of water and mild dish soap.
    Yellow Leaves: Both overwatering and underwatering can cause the leaves to turn yellow. Establish a consistent watering schedule and avoid allowing the soil to remain either waterlogged or completely dry for extended periods.
    Small or Stunted New Leaves: New leaves that remain unusually small are often caused by a pot that is too small, poor nutrition, or inadequate light. Repot the plant if necessary, provide proper fertilization, and move it to a brighter location with indirect sunlight.


    Introduction to Calathea, Calathea Care and Growing Guide
    0 Introduction to Calathea, Calathea Care and Growing Guide

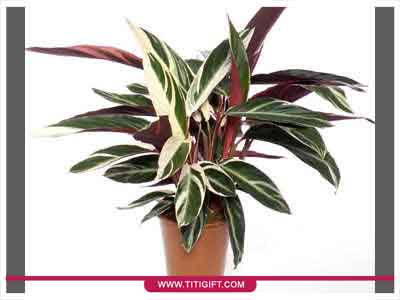
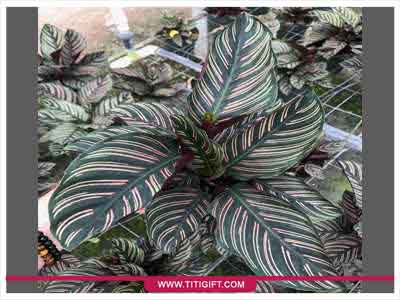
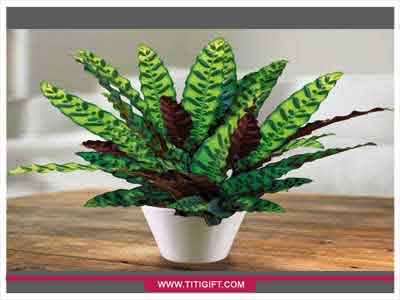
    The Calathea potted plant is a very beautiful ornamental plant with delicate leaves and a wide variety of colors. This plant is native to tropical regions, and its name comes from the Greek word meaning something similar to “basket.” Its attractive appearance and unique characteristics have made it an excellent option for ordering flowers and buying indoor plants.
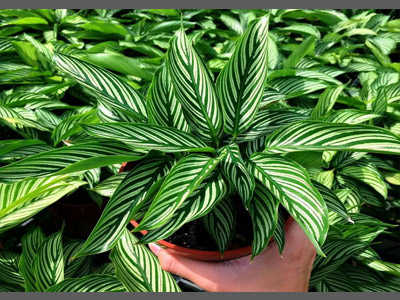
    Calathea has around 270 different species and belongs to the Marantaceae family. These plants vary greatly in shape, color, and size, and their height usually ranges from 15 to 30 cm. Decorative varieties of Calathea pots are especially popular because of their colorful, patterned, spotted, and striped leaves.
    One of the fascinating features of Calathea is that its leaves fold upward in the evening and reopen in the morning. In flower shops, the flowers of some species can be found in white, yellow, orange, and other colors, and a few species are even edible.


    Different Types of Calathea
    Calathea crocata:
    Native to Brazil, this species has wavy leaves. The upper surface of the leaves is dark green, while the underside may be purple, red, yellow, or orange. These plants have long stems and their flowers usually last 6 to 8 weeks. They require temperatures above 19°C and bright indirect light.
    Calathea lancifolia:
    This species has long, narrow leaves and can grow taller than 45 cm. The main leaf color is light green with olive-green patterns along the edges, and the undersides are purple.
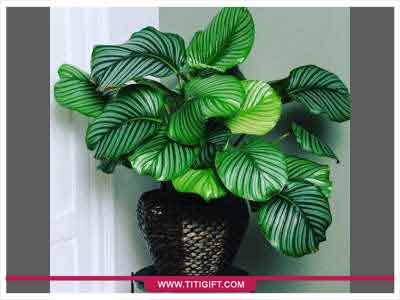
    Calathea orbifolia:
    This species has large round green leaves and grows up to about 40 cm tall. The leaves are decorated with alternating green and cream-colored bands, and the underside is noticeably lighter than the upper surface.
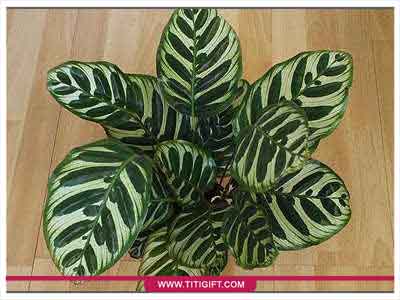
    Calathea makoyana:
    This species has oval green leaves about 15 cm long, with pale purple coloring on the undersides.

    Calathea Plant Care
    In their natural habitat, Calatheas grow in tropical environments. Therefore, when buying a Calathea potted plant, you should provide environmental conditions similar to their native habitat, including suitable placement, temperature, and humidity. In professional flower care, maintaining these conditions is essential for keeping the plant healthy and vibrant.
    Light: Calatheas need bright indirect light. Avoid placing them in direct sunlight. If the leaves bend toward one side, it may indicate excessive light exposure. The best place for this plant is near a window covered with a sheer curtain. Keep the plant at a temperature between 18 and 25°C with humidity levels of 70–80%, and avoid exposing it to temperatures below 18°C.
    Soil: For ordering a Calathea houseplant, the soil should be rich in fiber and humus and allow good oxygen circulation. Mixing perlite with the soil improves drainage and water retention. A peat-based substrate is ideal, and a mixture of peat moss and compost also works well. The soil pH should be between 4.5 and 5.5 and should be checked regularly if possible.
    Repotting: Calathea has relatively strong roots, so it should be moved to a larger pot every 2–3 years. The best time for repotting is before new growth begins. Remove the plant carefully to avoid damaging the roots. Inspect the roots and trim away any rotten sections. Ensure proper drainage in the new pot by placing coarse sand or perlite over the drainage holes. Then position the plant, fill the pot with soil up to about 2 cm below the rim, gently firm the soil, and water thoroughly.
    Watering: Calathea requires relatively frequent watering. From May to September, water the plant regularly with lime-free water. However, excessive watering can damage the roots just as much as underwatering. Keep the soil consistently moist, but allow the top layer to dry slightly between waterings. Brown spots on the leaves often indicate low humidity. To increase humidity, mist the leaves occasionally or use a humidifier. Water containing high levels of lime may also cause leaf spotting. Tap water can be used if it is left standing in a container for 24 hours so that minerals can settle. Since the leaves tend to collect dust, wipe them gently with a damp cloth from time to time.
    Fertilizing: Calathea does not require frequent fertilization. During the active growing season, add a liquid fertilizer to the irrigation water. Choose a fertilizer that is low in fluoride and salts. No special fertilizer is necessary; a standard houseplant fertilizer is sufficient.
    Pruning: Pruning is limited compared with many other plants. Simply remove dry leaves and faded flowers to keep the plant looking tidy.
    Winter dormancy: Calathea usually does not enter a true dormancy period. During the colder months (October to February), it can be kept in a slightly cooler location, but temperatures should never fall below 18°C. Because indoor heating systems reduce humidity during winter, the plant becomes more vulnerable to pests, so maintaining adequate moisture in the soil and surrounding air is very important.
    Diseases
    Root rot: Root rot is usually caused by overwatering or excessive salts in the fertilizer. It is a serious condition that can threaten the plant’s survival. Symptoms include yellowing and drying of leaves and stems. Remove the affected roots and leaves, then transfer the plant to a new pot with fresh, well-draining soil.
    Pests
    Spider mites: Spider mites often appear on the undersides of leaves during winter when the air is dry. Wash the plant thoroughly and use an appropriate miticide if necessary. Increasing humidity around the plant will also help prevent infestations.
    Thrips: Yellow, spotted leaves may indicate a thrips infestation. To control these pests, regularly spray the plant with a mild solution of water and soap.


    Introduction to Echinocactus, Echinocactus Cactus Care and Growing Guide
    0 Introduction to Echinocactus, Echinocactus Cactus Care and Growing Guide

    English name: Echinocactus
    Family: Cactaceae
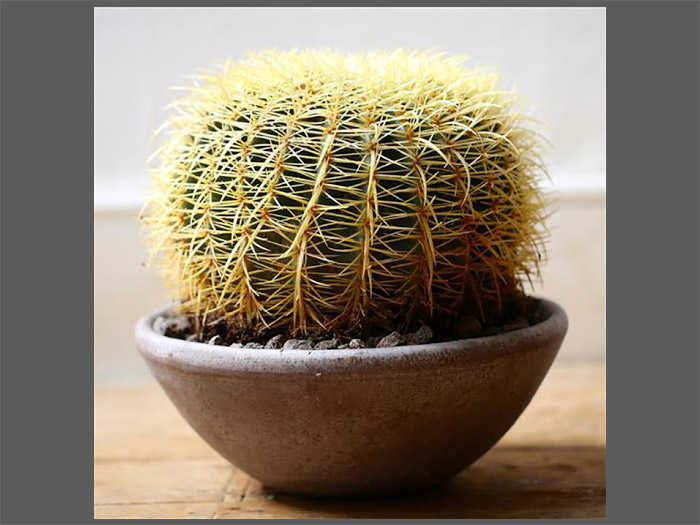
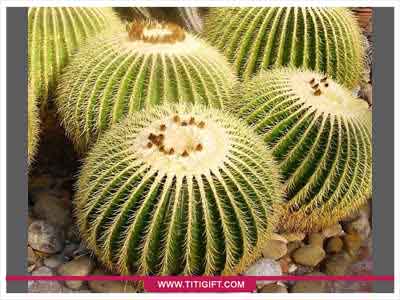
    Echinocactus is divided into six species depending on its compact growth and the woolly phase that forms at the apex. The woolly growth at the top of this cactus increases its flowering ability. In areas with high humidity and low sunlight, Echinocactus usually does not bloom. The presence of yellow spines and deep longitudinal ribs are among the most distinctive characteristics of this cactus. If the plant grows under ideal conditions, it can reach about 1 meter in diameter and up to 1.5 meters in height. Funnel-shaped yellow or pink flowers and dry fruits are other notable features of Echinocactus.
    By ordering an Echinocactus houseplant, which is one of the easiest cactus species to grow, it can be propagated easily through seeds. In flower shops, it is known for its relatively fast growth, tolerance to a wide range of harsh conditions, and resistance to improper care or handling. Its striking appearance, especially the golden-yellow spines, has made it a popular ornamental cactus.
    Types of Echinocactus:
    Echinocactus grusonii
    Echinocactus horizonthalonius
    Echinocactus parryi
    Echinocactus platyacanthus
    Echinocactus polycephalus
    Echinocactus texensis


    Watering Echinocactus: Moderate watering is needed during spring and summer, but watering should be reduced in autumn. This plant should only be watered two to three times during winter. Avoid overwatering, as the natural growing conditions of cacti are different from those of most houseplants. When ordering this plant, keep in mind that it should never be watered during the day while it is under direct sunlight. Watering in strong sunlight may cause sunburn, fungal attacks, and scarring on the plant.
    Suitable soil for Echinocactus: Cacti can grow in different soil types such as rocky, sandy, or clay soils, but the best mix is one that drains quickly while still retaining a small amount of moisture. From a florist’s perspective, cactus soil should be porous and well-aerated so water can drain easily and the roots can breathe properly. Climate is also an important factor in choosing the right soil. In warm climates, cacti need lighter and more permeable soil, while in colder climates, where watering is less frequent, a slightly heavier soil is more suitable. In general, cacti prefer soil with a pH below or close to 7.
    Suitable temperature for Echinocactus: If you plan to buy an Echinocactus houseplant, provide moderate warmth from spring to autumn and a cool place during winter. The ideal temperature is around 10–11°C, although many cacti can tolerate temperatures down to 5°C. If the weather becomes very cold and there is no heating source available, move cacti away from windows and into a warmer room. Some cactus species should be kept at around 15°C.
    Suitable light for Echinocactus: Place the cactus in the brightest possible location, especially during winter. In greenhouses, some shade is necessary during the hottest months of the year. Echinocactus prefers full sunlight, although intense direct sunlight on extremely hot days may cause sunburn.
    Suitable humidity for Echinocactus: Do not create humid conditions for this cactus during summer (except for Cleistocactus species). These plants need fresh air. Open windows during summer to allow proper air circulation around the plant.
    Pests and diseases of Echinocactus:
    Excessive watering and poor ventilation can lead to fungal diseases. If fungal symptoms appear, use Benomyl fungicide according to the recommended instructions.
    Mealybugs are another common pest and usually appear as tiny insects in the woolly parts of the plant. Frequent spraying with cold water can contribute to this problem. If detected, use Diazinon insecticide mixed with a small amount of dishwashing liquid.
    Spider mites are among the most dangerous and stubborn pests of Echinocactus. Early signs include yellow spots on the plant, which later turn brown as the infestation becomes more severe. Dry air encourages spider mites. The simplest preventive method is to spray the plant regularly with lukewarm water. There is no easy specific treatment for severe infestations.
    Overwatering during winter can cause fungal rot and may eventually kill the plant.
    Propagation methods of Echinocactus:
    The most important propagation method is by sowing seeds. Seeds are usually planted from April to May, although they can be sown in any season if suitable conditions are provided.
    Echinocactus can also be propagated by cutting off the top of the plant to encourage offsets (pups). This should be done during the growing season. About 3–4 weeks after cutting, small white woolly spots appear on the stem. Over time, these spots develop into small Echinocactus pups. Once the pups become large enough, they can be separated from the mother plant and rooted in a light, well-drained soil.
    Pot selection for Echinocactus:
    Echinocactus prefers shallow and wide pots. Therefore, terracotta or clay pots are the best choice for planting this cactus.


    All About Lisianthus Flowers
    0 All About Lisianthus Flowers

    Lisianthus (Eustoma grandiflorum) is a beautiful flowering plant native to the grasslands of North America, particularly the states of Nebraska, Colorado, and Texas. It belongs to the Gentianaceae family and is commonly known as the Prairie Gentian or Texas Bluebell because of its elegant blue wildflowers. Today, Lisianthus has become one of the most popular flowers in the floral industry thanks to its wide variety of colors, delicate appearance, and exceptional vase life.

    Over the past few years, Lisianthus has become a favorite choice for floral arrangements and bouquets. Available in both single and double-petaled varieties, this flower is admired for its sophisticated beauty and is often mistaken for a rose due to its soft, layered petals. Its long-lasting blooms make it an excellent choice for bouquets, floral gifts, weddings, and luxury flower arrangements.

    Lisianthus is grown as an annual or short-lived perennial and comes in both tall and dwarf varieties. Tall stems are ideal for cut flower arrangements and bouquets, while compact varieties are perfect for decorative pots and indoor planters.

    Because Lisianthus is sensitive to being moved after planting, it is recommended to place it in its permanent location from the beginning and avoid repotting whenever possible. Deep pots with good drainage are the best choice for healthy root development.

    Lisianthus thrives in temperate greenhouse conditions and is sensitive to low temperatures. The ideal growing temperature is between 20–24°C (68–75°F) during the day and 16–18°C (61–64°F) at night. Cooler temperatures encourage stronger stems but may extend the growing period, while excessive heat during the first month after transplanting can cause rosette formation in sensitive cultivars.

    This elegant flower prefers full sunlight during its vegetative growth but benefits from filtered or softer light during blooming. Excessive light may reduce stem length, making the flowers less suitable for cut arrangements.

    Lisianthus grows best in neutral to slightly alkaline loamy soil with excellent drainage. The soil should remain consistently moist but never waterlogged. During the early stages of growth, the plant requires relatively little water; however, once flowering begins, the soil should not be allowed to dry out completely.

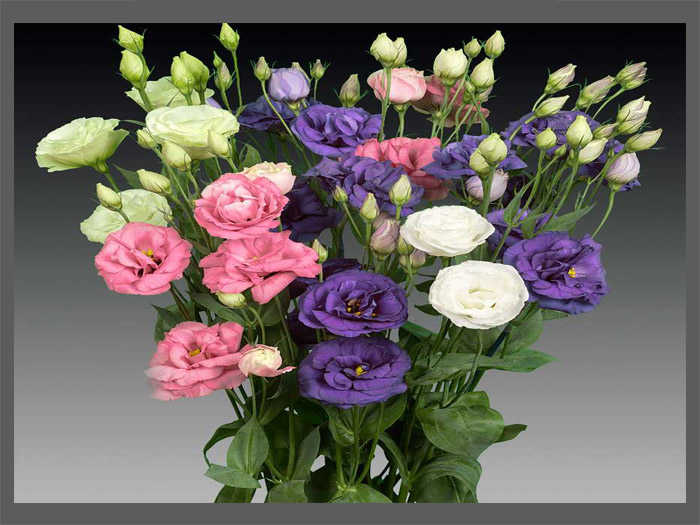
    Purple and white Lisianthus flowers
    One of the most attractive features of Lisianthus is its incredible color range. It is available in white, green, blue, lavender, lilac, pink, purple, red, cream, peach, and even bi-colored varieties. Some cultivars feature petals with contrasting edges, creating a stunning variegated appearance that makes them especially popular in premium floral designs.

    Each Lisianthus color carries its own symbolic meaning. Pink Lisianthus is a thoughtful gift for celebrating the birth of a baby or honoring a new mother. Red Lisianthus represents deep love and passion, yellow symbolizes happiness, friendship, and positive energy, while purple expresses loyalty, admiration, and lasting affection. Whether you're celebrating a special occasion or simply expressing your feelings, Lisianthus is an elegant and meaningful choice for any bouquet.

    Pink Lisianthus bouquet

    ```